Web (JS)
Quickstart
This quickstart shows how to integrate CashOver's Web SDK to accept fast, secure payments directly from your HTML or JavaScript applications.
You can also check out our example app on Github.
Before Getting Started
Make sure you:
- Have a CashOver merchant account
- Have created at least one store inside your merchant dashboard
- Know your merchantUsername and storeUsername
Step 1: Install CashOver Pay SDK
You can install the CashOver SDK in your web app via CDN. We provide different versions to suit your development and production needs:
- Production (Recommended)
- Production (Unminified)
- Development
For production deployments, use the specific versioned minified script with SRI for enhanced security:
<script
  src="https://cdn.cashover.money/js-sdk/0.1.1/cashover.min.js"
  integrity="sha384-[SRI_HASH_HERE]"
  crossorigin="anonymous">
</script>
Benefits:
- Minified for optimal performance
- Version-locked for stability
- SRI hash ensures file integrity and security
- Recommended for all production environments
For production with easier debugging, use the unminified version:
<script
  src="https://cdn.cashover.money/js-sdk/0.1.1/cashover.js"
  integrity="sha384-[SRI_HASH_HERE]"
  crossorigin="anonymous">
</script>
For local development, you can use the latest version to access the newest features:
<script
  src="https://cdn.cashover.money/js-sdk/latest/cashover.js"
  integrity="sha384-[SRI_HASH_HERE]"
  crossorigin="anonymous">>
</script>
⚠️ Warning: Do not use the
latestversion in production! The SRI hash changes with each release, which will break your production deployment. Always use a specific version for production.
This will expose a global cashover-pay-button object that you can use to initiate and manage payments.
Step 2: Configure the Payment
To initiate a CashOver payment, you'll need the following parameters — all available in your merchant dashboard:
| Parameter | Required | Description |
|---|---|---|
| merchantUsername | ✅ Yes | The merchant account username where the payment will be received. Example: market.example. |
| storeUsername | ✅ Yes | The specific store username processing the transaction. Example: store.example. |
| amount | ✅ Yes | The transaction amount to be charged. Example: 49.99. |
| currency | ✅ Yes | The currency code for the transaction (e.g., USD, LBP). Always follow the correct precision |
| webhookIds | ❌ No | Optional list of webhook IDs to notify upon payment status changes. Example: ['id1', 'id2']. |
| metadata | ❌ No | Optional additional information about the transaction in json format. |
| language | ❌ No | The language code for localization (e.g., en). |
| borderRadius | ❌ No | Optional UI parameter defining the border radius of the button, we advise to keep in the default format. Example: 8px. |
| theme | ❌ No | Optional UI parameter defining theme of the button. Example: light. |
⚠️ Make sure the values are accurate. Incorrect usernames or IDs may cause payment failures.
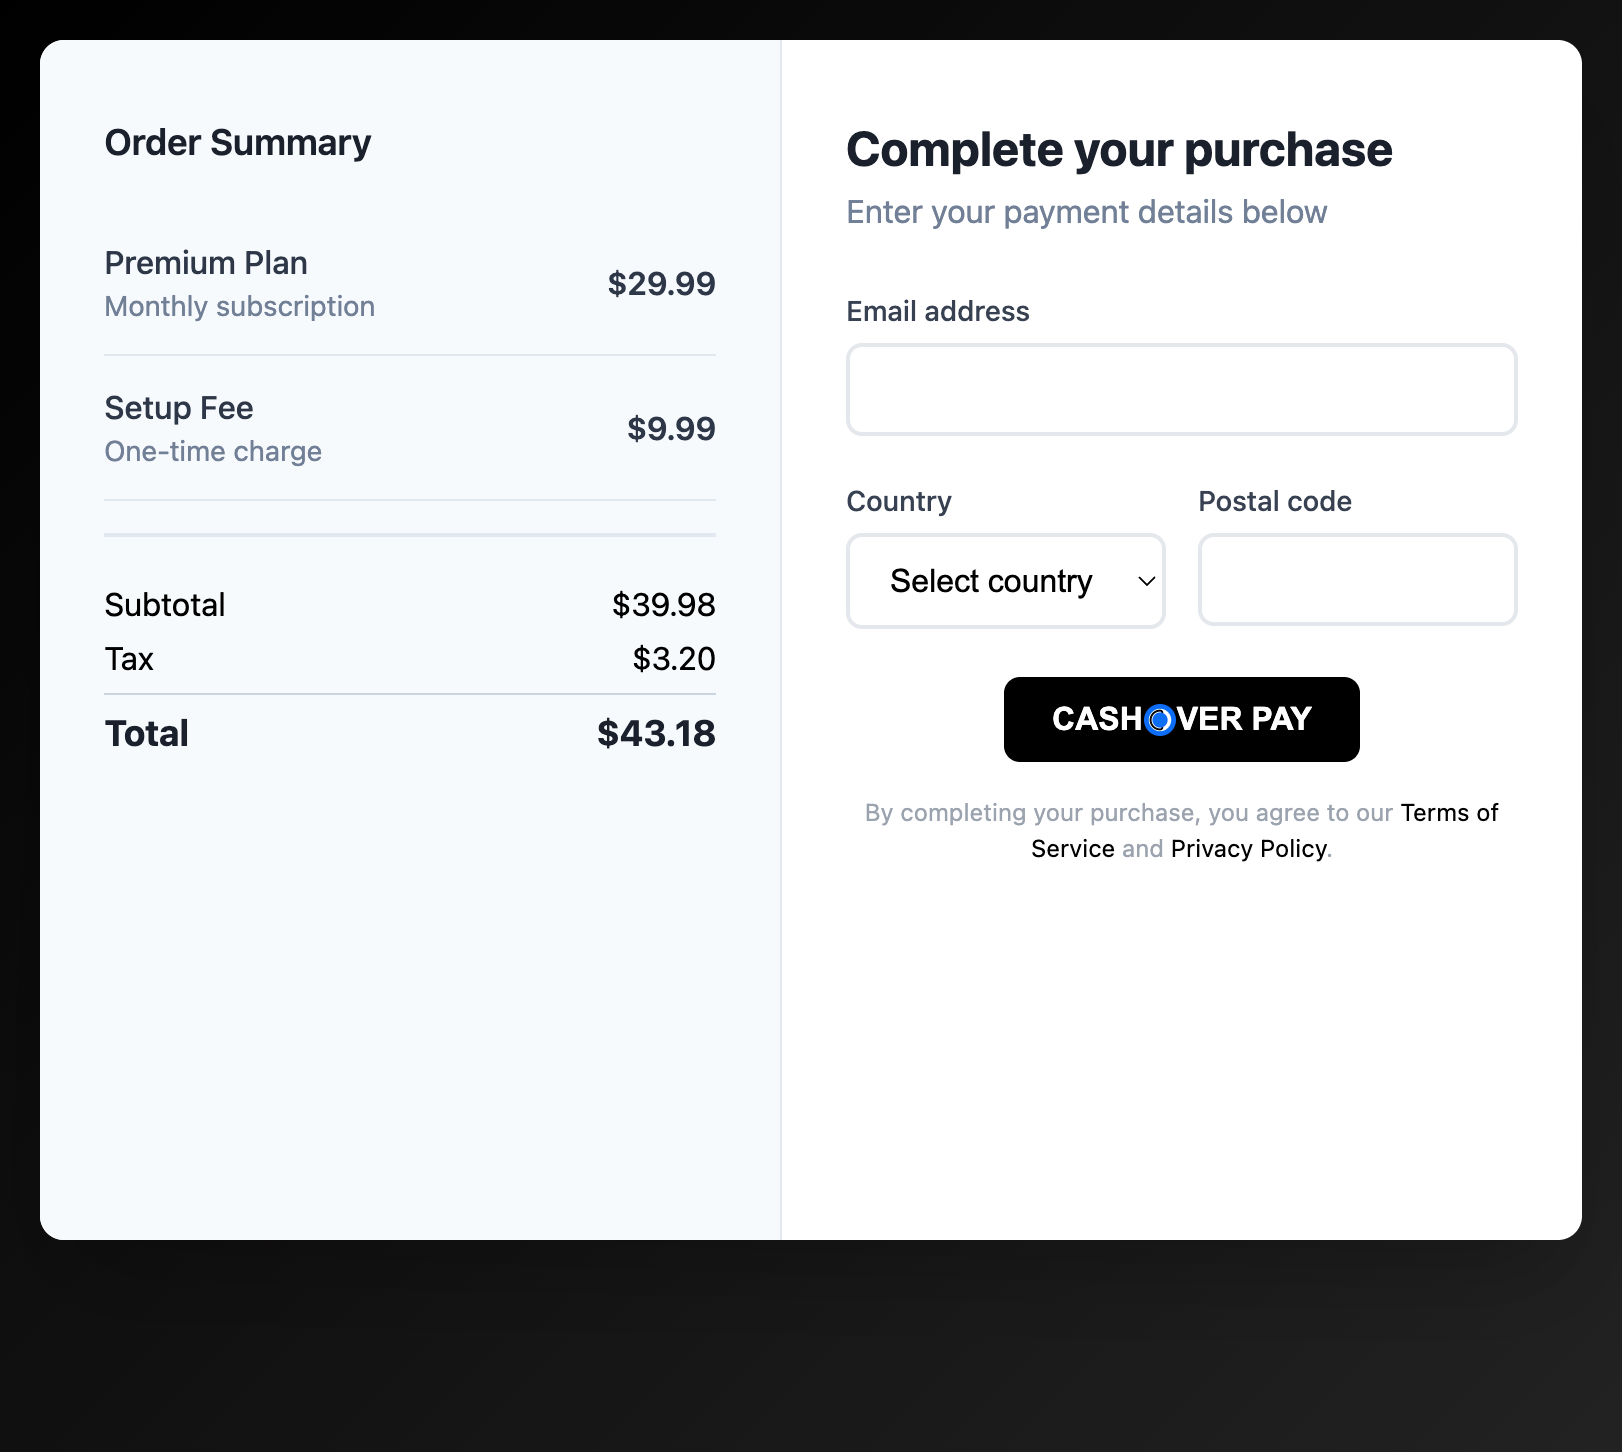
Step 3: Use the Prebuilt Payment Button
CashOver provides a prebuilt payment button that handles the entire flow:
 <cashover-pay-button
              merchantUsername="drop.market"
              storeUsername="al.beik"
              amount="43.18"
              currency="USD"
              webhookIds="['id1', 'id2']"
              metadata='{"orderId":"A1001", "email":"testEmail@mail.com", "country":"", "postalCode":"1"}'
              language="en"
              theme="light"
              borderRadius="8px"
            >
  </cashover-pay-button>
- metadata: Useful to tag the payment with contextual data like an orderId or sessionId
Step 4: Handle the Payment Result
Launching the CashOver App
After the user clicks the pay button, the CashOver Pay page will open automatically and the user will complete the payment.
Verifying Payment Status
To determine if a payment was successful, implement webhooks in your backend.
Typical workflow:
- Attach metadata (e.g.,
orderId) when the user initiates a payment. - Your webhook endpoint receives payment status updates from CashOver.
- Update your order status in your system based on the webhook payload.
- Reflect the updated status in your UI (for example, displaying "Payment Confirmed").
Using webhooks is the most reliable way to synchronize payment data and follows best practices in the payment industry.
Version Management Best Practices
Production Deployments
- Always use specific version numbers (e.g.,
0.1.1) - Use the minified version (
cashover.min.js) for better performance - Always include SRI hash for security
- Test thoroughly before deploying version updates
Development Environment
- Use the
latestversion for access to newest features during development - Switch to a specific version before moving to production
- Monitor our changelog for breaking changes between versions
Available Versions
| Version | cashover.js Hash | cashover.min.js Hash |
|---|---|---|
| v0.1.1 | sha384-ZpfGLppZfzuA6ymOtanwLwyWivHGQTZlgXAcX+FSxAfW2JbMCoB/55o+ga9ofqq/ | sha384-6EkYgwLDRJu/w09+04Pj+zpEVAK0QRqPyowYu7wbUv3iqC9WIRdo8D6Vk5QG18uO |
| latest | sha384-ZpfGLppZfzuA6ymOtanwLwyWivHGQTZlgXAcX+FSxAfW2JbMCoB/55o+ga9ofqq/ | sha384-6EkYgwLDRJu/w09+04Pj+zpEVAK0QRqPyowYu7wbUv3iqC9WIRdo8D6Vk5QG18uO |
You're Ready!
CashOver's Web SDK and prebuilt UI components make it easy to launch reliable, secure payments in your web apps with just a few lines of code.